
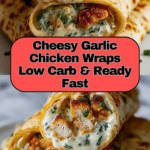
Low Carb Cheesy Garlic Chicken Wraps Recipe
Introduction
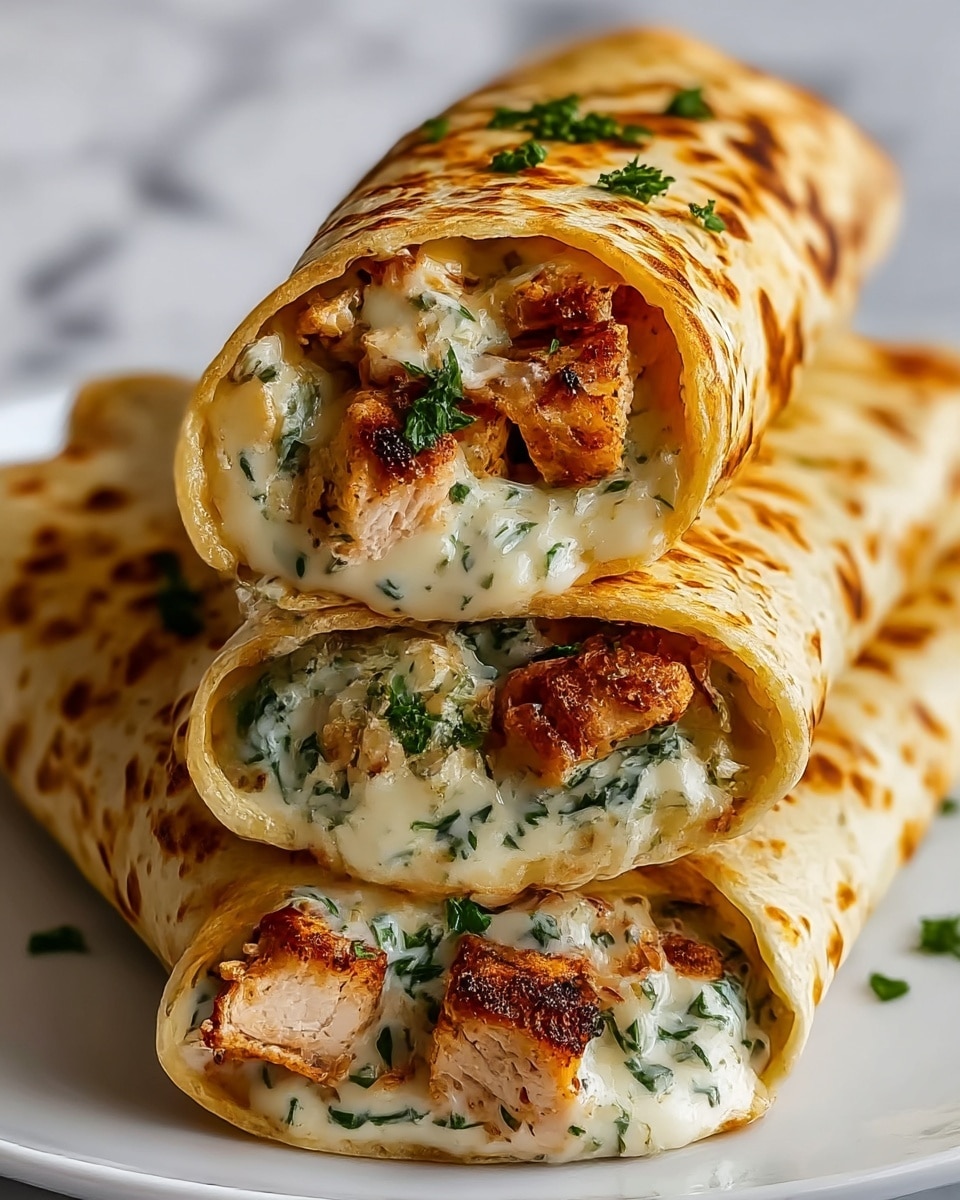
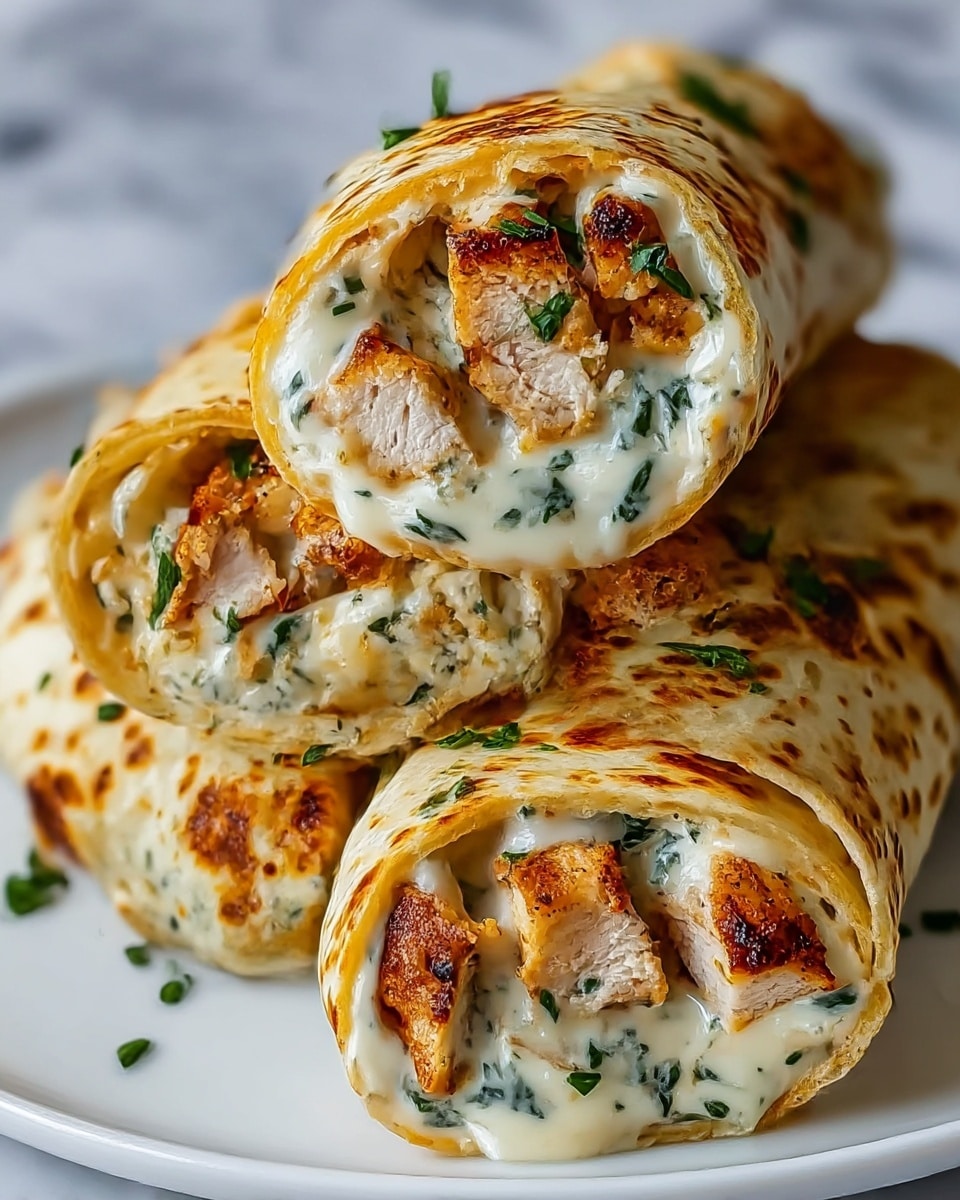
These Low Carb Cheesy Garlic Chicken Wraps are a delicious, easy-to-make meal that combines tender shredded chicken with gooey melted cheese and vibrant garlic flavor. Perfect for a quick lunch or dinner, they offer satisfying taste while keeping carbs low.
Ingredients
- 2 cups cooked chicken breast, shredded (rotisserie chicken works perfectly)
- 1 cup shredded mozzarella cheese (preferably shredded from a block)
- 1/2 cup shredded cheddar cheese
- 2 cloves garlic, minced (add an extra clove if you love garlic)
- 1/4 cup cream cheese, softened
- 1 tablespoon olive oil
- 4 large low-carb tortillas or wraps (Mission Carb Balance recommended)
- 1 tablespoon fresh parsley, chopped
- Salt and pepper to taste
- Handful of baby spinach, optional
Instructions
- Step 1: Preheat a skillet or grill pan over medium heat and add the olive oil. Meanwhile, warm your tortillas for 10-15 seconds in the microwave, covered with a damp paper towel to prevent cracking.
- Step 2: In a mixing bowl, combine the shredded chicken, mozzarella, cheddar, softened cream cheese, minced garlic, parsley, salt, and pepper. If using spinach, add it now. Mix thoroughly until the cream cheese coats everything evenly. Use a fork to break up the cream cheese if needed.
- Step 3: Divide the chicken mixture evenly among the tortillas, placing about 1/2 cup in the center of each. Avoid overfilling. Roll each tortilla tightly, tucking in the sides as you go, like a burrito.
- Step 4: Place wraps seam-side down in the preheated skillet. Cook undisturbed for 2-3 minutes per side until golden brown and the cheese starts to melt. If they brown too quickly without melting, reduce heat to medium-low. Remove from heat, slice in half diagonally, and serve while warm.
Tips & Variations
- Shred your own cheese from blocks for better melting and to avoid added starches found in pre-shredded cheese.
- Use rotisserie chicken to save time and add extra seasoning to the filling.
- Add baby spinach for extra nutrition without altering the flavor significantly.
- For a spicier twist, add a pinch of chili flakes or a dash of hot sauce to the filling.
Storage
Store leftover wraps in an airtight container in the refrigerator for up to 2 days. To keep them from sticking, place parchment paper between each wrap. Reheat in the oven at 350°F for 8-10 minutes to restore crispiness and melt the cheese evenly. They can also be enjoyed cold for a quick, protein-packed meal.
How to Serve
Serve this delicious recipe with your favorite sides.
FAQs
Can I use other types of cheese for these wraps?
Yes, you can substitute mozzarella and cheddar with other cheeses like Monterey Jack, Colby, or even a blend of your favorites. Just ensure they melt well to maintain the creamy texture.
Are these wraps suitable for freezing?
These wraps are best enjoyed fresh or refrigerated. Freezing can affect the texture of the tortillas and the creamy filling, so it’s not recommended.
Print
Low Carb Cheesy Garlic Chicken Wraps Recipe
- Total Time: 20 minutes
- Yield: 4 wraps 1x
- Diet: Low Carb
Description
Delicious and easy Low Carb Cheesy Garlic Chicken Wraps perfect for a quick, flavorful, and healthy meal. Combining tender shredded rotisserie chicken with a creamy blend of cheeses, garlic, and optional spinach wrapped in low-carb tortillas, then toasted until golden and melty for the perfect handheld delight.
Ingredients
Filling
- 2 cups cooked chicken breast, shredded (rotisserie chicken preferred)
- 1 cup shredded mozzarella cheese (shredded from a block for best melting)
- 1/2 cup shredded cheddar cheese
- 2 cloves garlic, minced (add extra if you love garlic)
- 1/4 cup cream cheese, softened (leave at room temperature for 30 minutes)
- 1 tablespoon fresh parsley, chopped
- Salt and pepper to taste
- Handful of baby spinach (optional, adds nutrition without changing flavor)
Wraps and Cooking
- 4 large low-carb tortillas or wraps (Mission Carb Balance recommended)
- 1 tablespoon olive oil
Instructions
- Prepare Ingredients: Soften the cream cheese by leaving it out for 30 minutes before mixing. Mince garlic finely and shred cheeses from blocks for ideal melting texture.
- Warm Tortillas and Heat Skillet: Preheat a skillet or grill pan over medium heat and add olive oil. Meanwhile, warm tortillas in the microwave for 10-15 seconds covered with a damp paper towel to keep them pliable and prevent cracking when rolled.
- Mix Filling: In a mixing bowl, combine shredded chicken, mozzarella, cheddar, softened cream cheese, minced garlic, parsley, salt, and pepper. Add baby spinach if using. Mix thoroughly until cream cheese is evenly coating all ingredients, creating a creamy, garlicky filling. Use a fork to break up the cream cheese if needed.
- Assemble Wraps: Divide the chicken mixture equally among tortillas, placing about 1/2 cup in the center of each. Avoid overfilling to prevent tearing. Roll the tortillas tightly, tucking in the sides like a burrito to hold the filling securely.
- Cook Wraps: Place the wraps seam-side down in the preheated skillet. Cook undisturbed for 2-3 minutes per side until wraps achieve golden-brown grill marks and cheese starts to ooze slightly. Reduce heat to medium-low if they brown too fast before cheese melts. Remove from heat once crispy and melty.
- Serve: Slice wraps in half diagonally and serve immediately to enjoy warm melted cheese and crispy exterior.
Notes
- Using rotisserie chicken saves time and adds flavor.
- Shredding cheese from blocks improves melting and avoids added starches.
- Microwaving tortillas with a damp towel keeps them flexible for rolling.
- To store, place wraps in an airtight container with parchment paper between each and refrigerate for up to 2 days.
- Reheat wraps in the oven at 350°F for 8-10 minutes to restore crispiness and melty cheese.
- These wraps can be eaten cold for a quick protein-packed snack.
- Include spinach to boost nutrition without altering flavor significantly.
- Prep Time: 10 minutes
- Cook Time: 10 minutes
- Category: Lunch
- Method: Frying
- Cuisine: American
Keywords: low carb chicken wraps, cheesy chicken wraps, garlic chicken wraps, healthy chicken wraps, quick low carb meal, rotisserie chicken wraps
