
No-Bake Cream Cheese Peanut Butter Pie with Chocolate Whipped Cream Recipe
Introduction
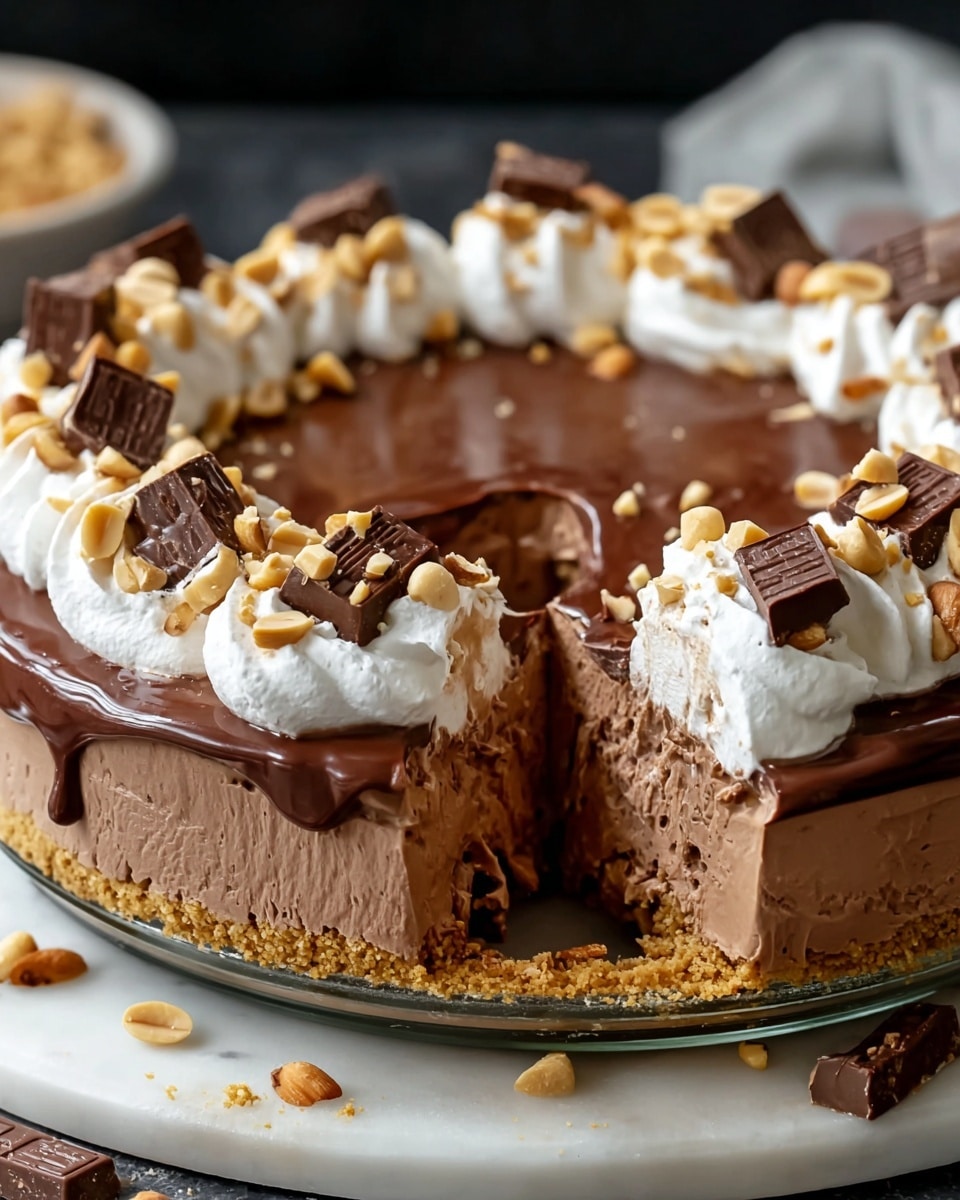
This No-Bake Cream Cheese Peanut Butter Pie with Chocolate Whipped Cream is an irresistible treat combining creamy peanut butter and rich chocolate flavors. Perfect for those who want a quick and indulgent dessert without turning on the oven.
Ingredients
- 1 1/2 cups graham cracker crumbs
- 1/4 cup granulated sugar
- 6 tablespoons unsalted butter, melted
- 8 oz cream cheese, softened
- 1 cup creamy peanut butter
- 1 cup powdered sugar
- 1 teaspoon vanilla extract
- 1 cup heavy whipping cream (for filling)
- 1 cup heavy whipping cream (for chocolate whipped cream)
- 2 tablespoons cocoa powder
- 1/4 cup powdered sugar (for chocolate whipped cream)
- 1 teaspoon vanilla extract (for chocolate whipped cream)
Instructions
- Step 1: In a mixing bowl, combine graham cracker crumbs, granulated sugar, and melted butter. Stir until the crumbs are evenly coated and the mixture feels like wet sand.
- Step 2: Press the crust mixture firmly into the bottom and up the sides of a 9-inch pie dish. Use the bottom of a measuring cup for an even, compact crust. Chill in the refrigerator while you prepare the filling.
- Step 3: In a large bowl, beat together the softened cream cheese and peanut butter until smooth and creamy.
- Step 4: Add powdered sugar and vanilla extract to the peanut butter mixture and beat until well combined.
- Step 5: In a separate bowl, whip 1 cup heavy cream until stiff peaks form.
- Step 6: Gently fold the whipped cream into the peanut butter mixture until smooth and fully incorporated.
- Step 7: Spoon the filling into the chilled crust and spread evenly. Smooth the top with a spatula. Cover and refrigerate for at least 3 hours or until set.
- Step 8: To make the chocolate whipped cream, combine 1 cup heavy whipping cream, cocoa powder, powdered sugar, and vanilla extract in a bowl. Whip until stiff peaks form.
- Step 9: Spread or pipe the chocolate whipped cream over the chilled pie just before serving.
- Step 10: Slice and serve chilled. Enjoy your creamy, chocolatey peanut butter pie!
Tips & Variations
- For extra crunch, sprinkle chopped peanuts or chocolate chips over the peanut butter filling before chilling.
- Use crunchy peanut butter if you prefer a textural contrast.
- Substitute the graham cracker crust with a chocolate cookie crust for a richer base.
- Make the pie a day ahead for the best flavor and texture development.
Storage
Store the pie covered in the refrigerator for up to 3 days. Keep it chilled to maintain firmness. If desired, allow it to sit at room temperature for 10 minutes before serving for a softer texture. Do not freeze, as the texture may change upon thawing.
How to Serve
Serve this delicious recipe with your favorite sides.
FAQs
Can I use natural peanut butter instead of creamy?
Yes, but natural peanut butter may be less sweet and slightly oilier, which can affect the texture and flavor. You might want to adjust the powdered sugar to balance sweetness.
Do I need an electric mixer to whip the cream?
While an electric mixer makes whipping cream easier and faster, you can also use a whisk. Just be prepared for a bit of an arm workout and whip until stiff peaks form.
Print
No-Bake Cream Cheese Peanut Butter Pie with Chocolate Whipped Cream Recipe
- Total Time: 3 hours 20 minutes
- Yield: 8 servings 1x
- Diet: Vegetarian
Description
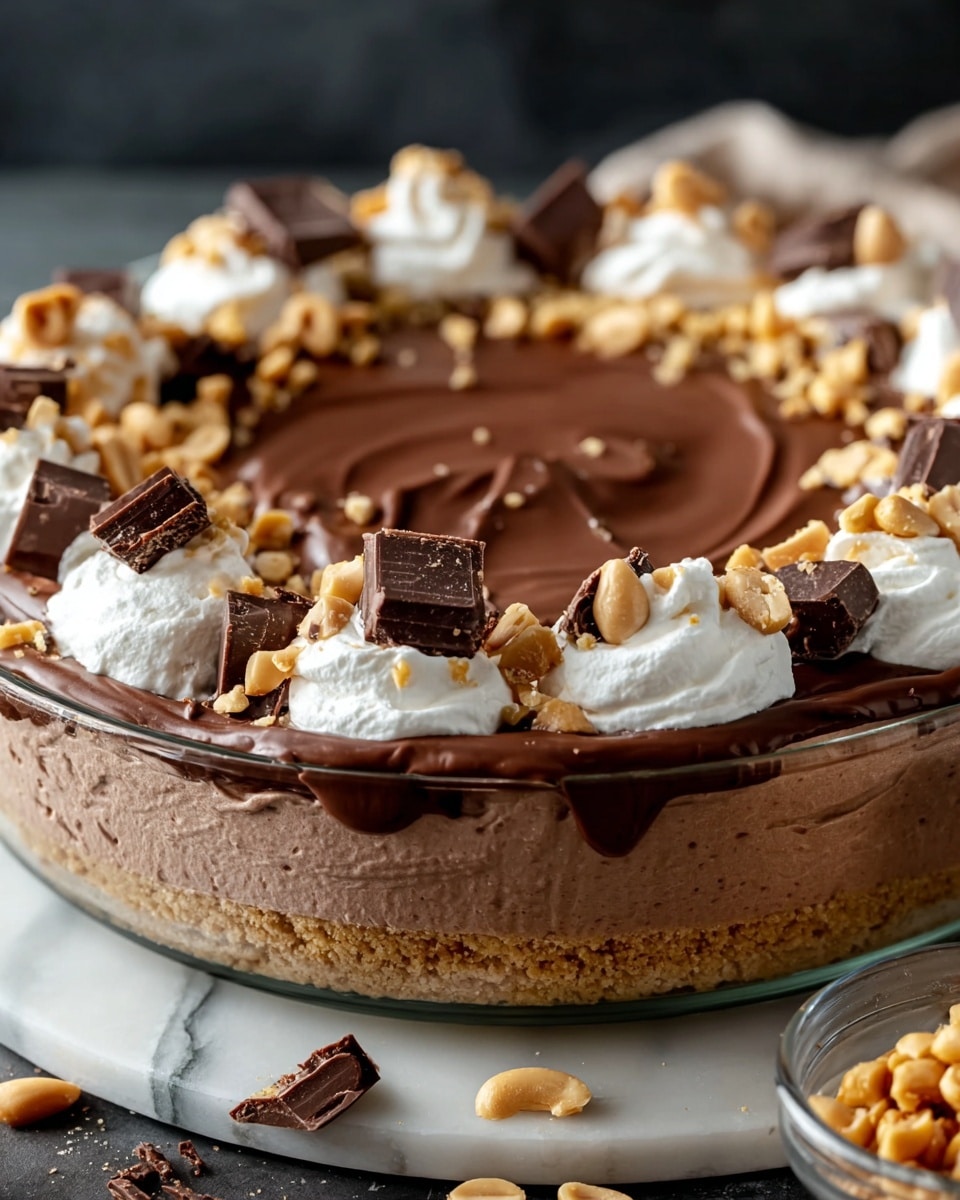
This no-bake cream cheese peanut butter pie with chocolate whipped cream is a luscious and creamy dessert featuring a crunchy graham cracker crust, a smooth peanut butter filling, and a rich chocolate whipped cream topping. Perfect for easy preparation without any oven use, it’s an indulgent treat that combines the classic flavors of peanut butter and chocolate in a simple, chilled pie.
Ingredients
For the Crust:
- 1 1/2 cups graham cracker crumbs
- 1/4 cup granulated sugar
- 6 tablespoons unsalted butter, melted
For the Peanut Butter Filling:
- 8 oz cream cheese, softened
- 1 cup creamy peanut butter
- 1 cup powdered sugar
- 1 teaspoon vanilla extract
- 1 cup heavy whipping cream
For the Chocolate Whipped Cream:
- 1 cup heavy whipping cream
- 2 tablespoons cocoa powder
- 1/4 cup powdered sugar
- 1 teaspoon vanilla extract
Instructions
- Prepare the Crust: In a mixing bowl, combine the graham cracker crumbs, granulated sugar, and melted butter. Stir until the crumbs are fully coated and the mixture resembles wet sand. Press the mixture evenly into the bottom and up the sides of a 9-inch pie dish. Use the bottom of a measuring cup to press the crust firmly in place. Chill the crust in the refrigerator while you prepare the filling.
- Make the Peanut Butter Filling: In a large mixing bowl, beat the softened cream cheese and peanut butter together until smooth and creamy. Add the powdered sugar and vanilla extract, and beat until well combined. In a separate bowl, whip the heavy cream until stiff peaks form. Gently fold the whipped cream into the peanut butter mixture until fully incorporated and smooth.
- Assemble the Pie: Spoon the peanut butter filling into the prepared crust and spread it out evenly. Smooth the top with a spatula. Cover the pie with plastic wrap or aluminum foil and refrigerate for at least 3 hours, or until set.
- Make the Chocolate Whipped Cream: In a mixing bowl, combine the heavy whipping cream, cocoa powder, powdered sugar, and vanilla extract. Whip the mixture with an electric mixer or hand mixer until stiff peaks form.
- Add the Whipped Cream: Spread or pipe the chocolate whipped cream over the chilled peanut butter pie.
- Serve: Slice and serve chilled to enjoy the rich and creamy flavors of this delightful no-bake pie.
Notes
- Ensure the cream cheese is softened to room temperature for easy mixing and a smooth filling.
- Press the crust firmly to help it hold together once chilled.
- Chilling the pie for at least 3 hours allows it to set properly and develop flavors.
- For a firmer crust, you can toast the graham cracker crumbs lightly before mixing with butter.
- Use an electric mixer for whipping cream to achieve the best stiff peaks.
- Store leftovers covered in the refrigerator and consume within 3 days for best freshness.
- Prep Time: 20 minutes
- Cook Time: 0 minutes
- Category: Dessert
- Method: No-Cook
- Cuisine: American
Keywords: No-bake pie, peanut butter pie, cream cheese pie, chocolate whipped cream, easy dessert, summer dessert


